Showing posts with label made by me. Show all posts

Wednesday, 27 July 2011

Invite only


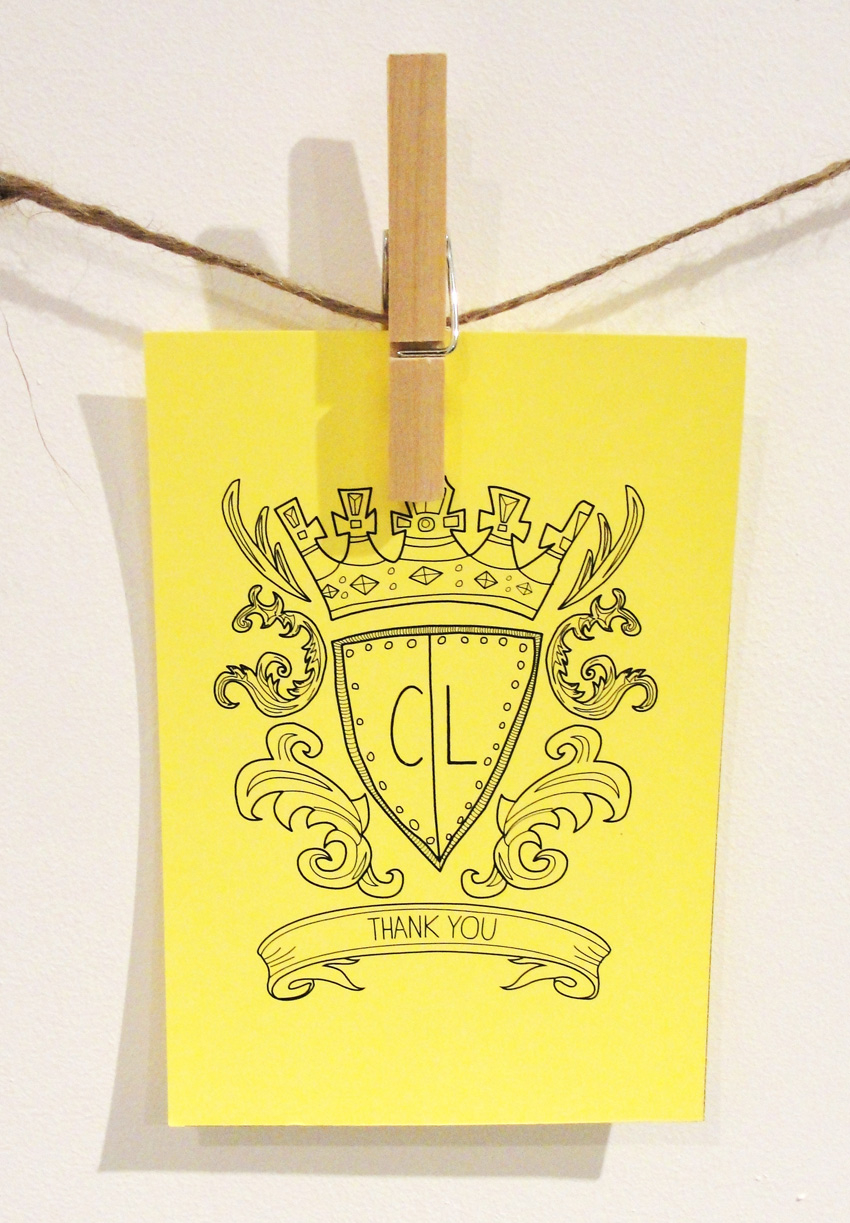
My husband designed all our invites/menu/order of service etc for our wedding, including the tea towels we had printed as invites.  The idea for doing the invite as a tea towel came because we wanted something a bit tongue in cheek.  Chris saw a lot of the tacky memorabilia that was bought out to celebrate the wedding of  Prince WIlliam and Kate.  We  came across old tea towel designs from previous royal weddings and decided to do our own which Chris designed and then got digitally printed.

We had a rough colour scheme of yellow/white/grey and pink which we used in the printed materials.  The little bird pegs I made by cutting out bird images from an old bird book and gluing them onto wooden pegs.  I made lots of them for the wedding so guests could pin up their messages and pictures to us at the reception (we had a table with an old fashioned typewriter and an easel with pens and paints for people to type, write or draw messages for us.

Friday, 26 November 2010

Christmas Craft No.1 - Stamp it out

I worked out a way of making super-quick stamps just using a cotton reel and a piece of foam sheet, which you can buy in most art and craft shops, they only cost about 50p a sheet, all I did was cut out the shape of stamp I wanted in the foam and glued it onto the cotton reel - you could glue it onto a wooden block, but I didnt have one to hand. I used the stamp to stamp on cloth and paper and its worked out pretty neat - think that's my xmas wrapping paper ideas sorted for this year!

Thursday, 25 November 2010

Bobbin along

An old clipboard, some paper doilies and a few cotton spools (and some PVA and No More Nails) is all you need to create this natty little jewellery hanger - or you could use it to hold things in the kitchen and utilise the clip at the top to hold your shopping lists etc. Cut the paper doilies to size and coat one side with PVA, stick them onto your board and then coat the whole board with a layer of PVA to seal it. Then simply get your spools and add a dab of no more nails onto the bottom of each spool and put in place, leave overnight and your jazzy little jewellery hanger will be good to go.

Its a cushy job!


Before

After

I had an old, unflattering long grey cardie which I originally bought in a charity shop in a moment of fashion madness. It was languishing at the back of my wardrobe for months when I decided to revamp it into this woolly cushion cover. I'm not 100% on this revamp - I'm not sure whether it just looks like a fat tummy! But you can keep your remote control in the pocket I guess!

Christmassy Challenge

link

30 days til Xmas (If I counted right!) and I havent done any xmas decorating or present making as I've been tied up with other stuff 'til recently, and moreover, I keep putting it off coz there is so much to do! So, I have set myself a wee challenge to make and blog about something christmassy I am making as a present or to decorate the house every day 'til xmas. I am putting this idea 'out there' because it's the only way I'm going force myself to do it. So, I had stop scoffing mince pies and start stitching, gluing and cutting.

Friday, 19 November 2010

Flare up


Before
After

I was on one my regular bargain hunts, when I sniffed out these bellbottom/flare style jeans (excuse the bad pics). I loved the colour of the denim, but not the style. I often feel that short, plump little ladies like me can't really pull off the bellbottom look, plus I dont often wear heels, which means that these bad boys were not only too flarey but also far too long. Anyway, encouraged by the colour and price (£3.00) of these charity shop jeans, I took 'em home and refashioned them into the current trend skinny jean. I just took them up and in (from the outside seam of each leg) and now I wear these natty little troos all the time!

Typewriter tags


I just found this old pic of one of the tags I made for my brother's wedding favours. Dead easy to do, providing you have access to an old fashioned typewriter (I picked one up in the charity shop for £5). I just scrolled the fabric into the typewriter, the same way you would with paper and typed away. I hole punched the holes in the cloth and added a little scrap of patterned fabric to brighten it up.

Wednesday, 17 November 2010

Isle be seeing you


in all the old familiar places!!....Why not use an old vintage tea-towel to re-cover an old chair pad, like this one I made last summer, using one of my Grandma's tea towels featuring the Isle of Wight. I just liefted of the seat pad, drew around it directly onto the tea towel adding an extra 1 1/2 " all the way round, cut it out and used a staple gun to attach the new fabric to the underside and then put the pad back.

Belle Jar


I love bell jars, cloches or specimen jars, whatever you want to call them, I love them. But I cannot afford the pricey tag of an expensive bell jar, or a taxidermy crow which I would love to have inside one of my imaginary bell jars, so I looked online at DIY ways to make bell jars. Many people had used old domed carriage clock cases, removing the clock part and painting up the base of the clock, and that works really well, but I don't have a carriage clock and its raining hard today so I didn't want to traipse round the charity shops looking for one. I've been keeping lots of empty jars recently for various crafty projects and I was looking at an old pickled onion jar which was stacked upside down and thought it could make a sort of DIY version of a bell jar, which a bit of TLC. So I knocked up this little version. Its nowhere near as good as the real thing but it'll do for now, although I might make a couple more as collections often look better than single objects. (This afternoon, I was scrolling thru my blog and came back across this post, so my idea wasn't original after all, and they have a crow!)

baby bunting


OK, so this isn't really for babies,and its a shocking pic - couldn't find a remotely good way to display it in the dark attic! It is mini bunting. I made this for a project I'm working on, but it struck me you could make this to add as pretty decoration on christmas presents or wrapped around jars of christmassy stuff this year. All you need is a bit of thick thread, some double sided sticky tape and a scrap of fabric. Lay a strip of double sided tape along the scrap of fabric (on the wrong side of the fabric) and cut out a diamond shape, peel off the backing of the double sided tape and fold the diamond shape over the thread. Its a little bit fiddly as they were so tiny but looks pretty cute.

Pretty Plates

Christmas is coming and this goose (me!) is getting pretty fat and I dont have many pennies to put in anyone's hat, so I'm on another handmade Christmas presents tip this year. Sorry family and friends - you'd better start practicing your 'what a lovely present' faces. They'll probably be a bit sick of my handmade wares by now! Anyway, if you are in a similar boat this year why not create some cute dinnerware or decorative plates, like these.


The first one is an old plate which has been knocking about the kitchen for some time looking plain and boring I found some porcelain/ceramic pens at Hobbycraft which cost less than £3 each (If I remember correctly) and you can use these to draw directly onto a ceramic surface of your choice. You can hand draw your design onto the plate in pencil (use a soft pencil for this) and then simply draw over the top with your pen. Why not create a set of personalised plates or cups for christmas.

I was inspired by a decorative plate display I saw on the wonderful Yvestown blog ages ago, but I didn't have any cute vintage plates with big floral designs so I decided to make one. This one is simply a decoupaged plate - I found a couple of images from a recent Country Living magazine and cut them out and using PVA glue, glued the images on and put another coat of PVA over the top to seal it. I did this in a hurry using images I found quickly, but if you hunt about for better images, I'm sure you could do a better job. These obviously can't be eaten off, unless you want a meal flavoured with PVA! But you could make cute decorative plates, I think I'm gonna make a heap more of these then I can display them in the house - or give them to unsuspecting family members!


Bobbin along


...singing a song (that I made up about how much I love old wooden bobbins!) I'm always trying to think up new ways to repurpose wooden bobbins as I think they are such pretty little vintage finds. I previously made buttons from them (see link here) and more recently saw a blog post about cutting a little slice into the side of a bobbin to create a photo holder, like the one I made above (I'm afraid I cant find the link to the original, if you know where it comes from plese let me know so I can credit the original post!). They are easy to make, you just need a junior hacksaw, just be careful of your fingers.

Wristy business...


I love fabric covered bangles, but I can't justify spending over £10 on these, plus they always look better if you wear a couple at once, and that is easily £20 out of my near-empty purse. So I got a couple of charity shop plastic bangles for 50p each and re-fashioned them into something I'd be happy to wear on my wrist. All I did was cut a strip of pretty fabric slightly longer than the circumference of the bangle and twice as wide, then smothered the outside and inside of the bangle with PVA and stick the fabric onto it, tucking the edges into the inside of the bangle, then I gave the fabric another coat of PVA to seal it, left it to dry overnight and it was good to go.

Wednesday, 15 September 2010

Spool Buttons


I have been looking for a winter coat for a while but they are either prohibitively expensive or not my style. I had a bit of a brainwave last night when I saw an old summer khaki coat in the wardrobe. I have had the coat since my uni days, so over 10 years - eeek! I've altered it already a number of times. So I took hooded top (which I no longer wear as its covered in paint) and I cut the hooded top up the middle at the front and sewed it into my khaki coat - ta da...New winter coat!! It doesnt look too shabby either.

I was going to buy some nice wooden buttons to sew down the centre of the coat to jazz it up a bit and was about to leave the house to go button shopping this morning when I suddenly realised I didnt need to buy any wooden buttons, I could use the ends of old wooden spools.

So, to make these bad boys all you need to do is collect a few old-fashioned wooden spools if don't have any already, often these are available on ebay, charity shops, freegle or from a relatives stash.

Then, using a saw (I only had a junior hacksaw in my 'toolkit' but it worked fine) cut the ends off the spool.

Using a gimlet or braddle, poke holes for your threads in the spool heads, you have to press down fairly hard and use a sort of screwing action with the tool but the holes are quick to make and look pretty good once done (almost as though they were drilled).

Before you sew them onto a garment or cushion etc, just give them a quick spray with a clear sealer to make sure they can stand up to the great British weather!

Thursday, 1 July 2010

Tutorials

I' ve added a few tutorials to my new tutorials page. Now you can learn to make a jam jar pincushion, learn how make shrink plastic buttons and also how to jazz up your old jam jars.

Old moodboards


A couple of my moodboards.

Saturday, 7 November 2009

Fantastic Plastic


I am obsessed with shrink plastic at the moment and hve been experimenting with buttons and charms etc - I need to perfect it and try clear plastic and other colors too, but I'm really enjoying making these, especially the girl charms at the top. 

These are now on sale at my etsy shop

Pattern paper mache


I've gone a bit (experi) mental this week and started papier macheing old pattern paper to make it stiffer and made these oddball things! 

Friday, 16 October 2009

Been busy....


... making bunting/mobiles using scraps of paper and lace etc, got carried away with with a few old wooly jumpers and a bit of old vintage clothkits fabric and made cushions and the blanket/throw - perfect for winter.(The cute little nelly I got from Kiss Prudence at one of our Craft Candy fairs). Also found this desk in a skip, me and my boyfriend went out under the cover of darkness to 'steal' it and then I sanded it down and then rubbed emulsion into it, to try and achieve the shabby beach feel (is that even a description??).

LinkWithin

Blog Widget by LinkWithin